You haven't signed in yet, you can have a better experience after signing in
*Please complete the payment within {{receiveCouponInfo.expire_at}}Previous use*
You haven't signed in yet, you can have a better experience after signing in



Activity Rules
1、Activity time:{{ info.groupon.start_at }} ~ {{ info.groupon.end_at }}。
1、Activity time:cease when sold out。
2、Validity period of the Group Buying:{{ info.groupon.expire_days * 24 }} hours。
3、Number of Group Buying:{{ info.groupon.need_count }}x。
Please Pay Attention
1、Teamwork process: Join/initiate a Group Buying and make a successful payment - Within the validity period, the number of team members meets the activity requirements - Group Buying succeeded!
2、If the number of participants cannot be met within the valid period, the group will fail, and the paid amount will be refunded in the original way.
3、The number of people required and the time of the event may vary among different products. Please pay attention to the rules of the event.
{{ 100 - select_host_combos_sku.promote_rate }}% off Revo Registry Cleaner Pro Registry Cleanup Management Backup Optimization Tool Software

Revo Registry Cleaner Pro - Safely clean, tune, and optimize your registry.
Advanced Registry Cleaner
Discovered a powerful registry cleaner with over 15 scan categories that can find and eliminate invalid and unnecessary registry entries. Customize your cleaning process with custom key inclusion/exclusion and 4 different deep scan modes.
Registry Adjuster
Customize your Windows experience with 50 registry adjustments. Easily optimize, fine tune, and solve problems to achieve smoother system performance.
registry alert
Maintain control by tracking changes in registry keys and values in real-time. View, save, and export registry modifications, and apply filters based on operation type or data content.
The registry observer monitors specified registry entries in real-time and immediately identifies the process responsible for system modifications.
Backup solution
Create personalized backups for specific keys, perform complete registry backups, or automate scheduled backups to ensure additional security of critical data.
The automatic backup function of the plan adds additional convenience, allowing you to automatically perform the backup process of custom registry entries and full backups.
Automation and updates
Our scheduled automatic cleaning feature allows you to experience uninterrupted operation by setting daily, weekly, or monthly cleaning using your preferred scanning mode. The automatic backup function will automatically backup your data according to your preferred schedule. Our product also ensures that you always stay up-to-date with the latest situation through automatic backend updates.
User centered functionality
Optimize your registry experience by choosing to scan all user accounts or only the current user account. Simplify your Windows registry maintenance through the automatic cleaning feature. Switch to dark mode for a comfortable interface that suits your preferences.
Official website:https://www.revouninstaller.com/products/revo-registry-cleaner-pro/
Download Center:https://revo-registry-cleaner.apsgo.cn
Delivery time:Manual online processing
Operating Platform:Windows
Interface language:Supports Chinese interface display and multiple language options.
Update Description:Free updates and usage during the maintenance period. After the maintenance period, the current version is valid for life.
Trial before purchase:30 day free trial.
How to receive goods:After purchase, the activation information will be sent to the email address at the time of placing the order, and the corresponding product activation code can be viewed in the personal center, My Orders.
Number of devices:The standard version supports installation on one computer, while the portable version can install its own USB flash drive for easy use.
Replace computer:Uninstall the original computer and activate the new computer.
Activation guidance:Open the software, click on the red "Register" button in the upper right corner, and then follow the prompts to activate it.
reference material:https://www.revouninstaller.com/support/

Any question

Revo Registry Cleaner User Manual
I. Overview
Revo Registry Cleaner can help you easily clean and maintain the Windows registry, remove invalid and residual registry entries, and optimize the performance and interface appearance of the Windows system. Cleaning up such invalid data can help you solve and avoid possible malfunctions and errors that may occur during the use of your computer.
In short, the Windows registry is the core database used by the Windows operating system and various installed programs and applications to store all the data necessary for their normal operation. It can be said that the registry constitutes the "backbone" of the Windows operating system - all data about installed programs and their settings, connected hardware and devices, and even various configurations and appearance settings of the Windows system are gathered here.
For example, when you install a program, the program will write its configuration information into the registry; The related drivers and components will also write specific data to the registry during the registration and installation process. However, in the subsequent use, update, uninstallation of the program, or the creation and editing of various files using the program, a large number of invalid entries are often generated in the registry. These invalid entries may not only cause a decrease in computer performance, but also lead to operational failures of existing programs, new installations, and even the operating system itself. Whether you use your computer for work or entertainment purposes, maintaining a healthy Windows registry is crucial for your daily computer experience.
Given the importance of the registry, it is particularly necessary to establish a backup mechanism. Although the Windows system itself has some built-in mechanisms for creating backups, you can also manage registry backups more conveniently through the "Backup Center" module of Revo Registry Cleaner. This module allows you to instantly create a complete backup of the entire Windows registry, or only backup specific parts that interest you - such as a registry key or registry hive. In addition, you can also schedule the backup process to automatically execute it on a regular basis.
If you want to know what specific changes have occurred in the registry and which program caused these changes, you can use another major module of Revo Registry Cleaner - Registry Watcher. This module allows you to select specific areas of the registry for real-time monitoring and/or recording, thereby tracking all activities within them - including specific changes, data comparison before and after changes, and the process of executing change operations. With this feature, you can easily identify and locate unexpected or even unauthorized registry changes caused by software that does not have the corresponding permissions or should not perform such operations.
Sometimes, fine-tuning the various parameter options of the operating system can be quite challenging, as many system configuration changes must be made directly in the registry, the "main repository" of Windows system settings. The Registry Tuner module allows you to easily and securely modify certain parameters and settings of the Windows operating system - these parameters and settings directly affect the security, appearance, and user experience of the system, making your computer usage process more convenient and smooth. Although many of these settings can usually only be changed by directly modifying the registry, with the help of a 'registry adjuster', this operation will become both simple and secure; If you are not satisfied with the modified effect, you can easily restore it to its original state.
2、 Revo Registry Cleaner main interface
The main interface is divided into two areas:Command PanelandCurrent tool panelThe upper part of the command panel displays various commands of the currently selected tool in the form of independent buttons; The lower part lists all the functional modules. Click any module to switch to the interface of the module. To activate a module, simply click on its corresponding button.
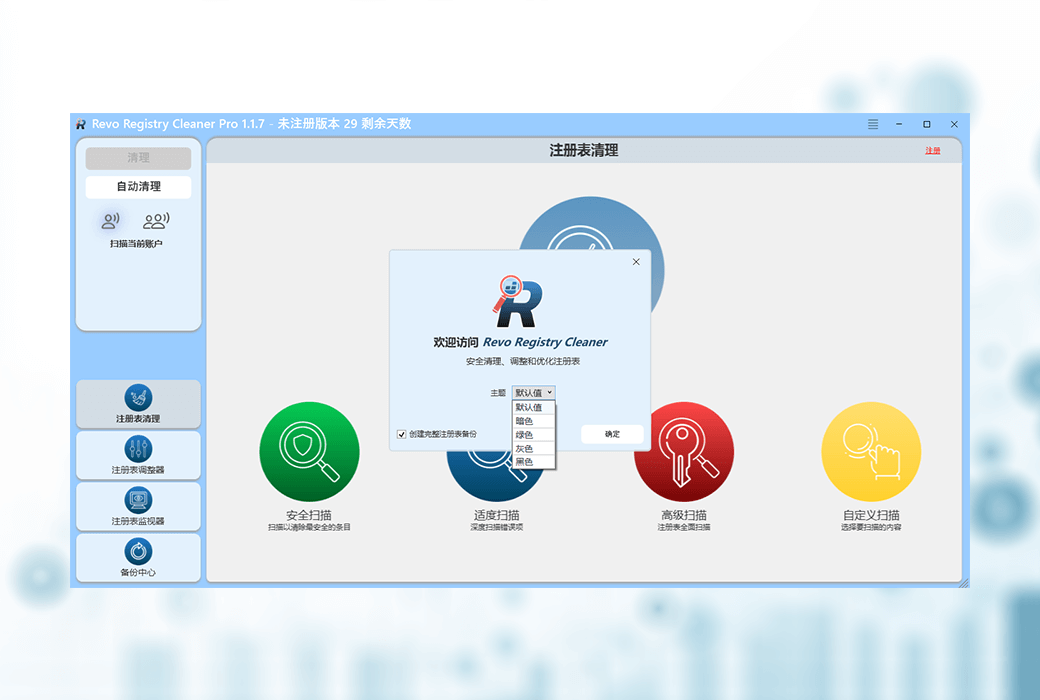
After the program starts, the system will automatically activate the "Registry Cleanup" module, and you will see prominent icons representing different scanning modes.
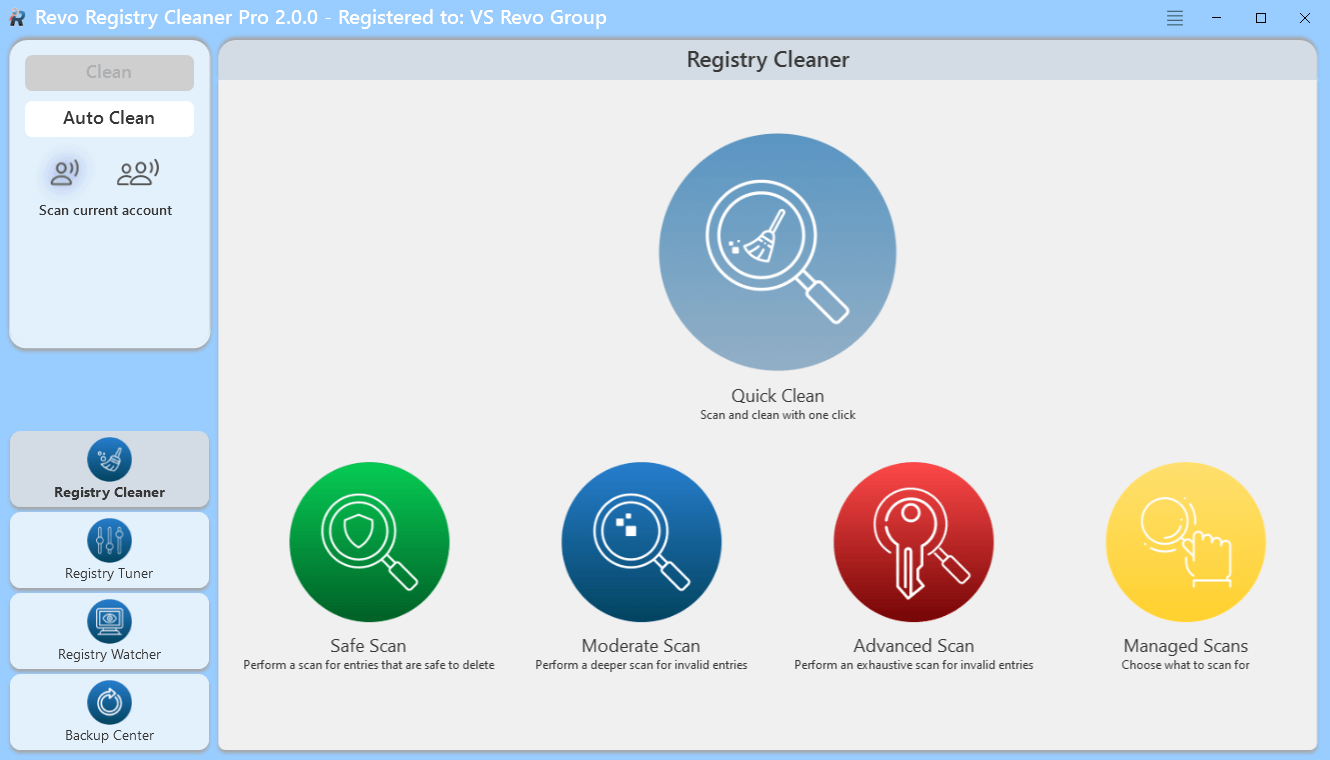
The 'Menu' button is located in the upper right corner of the window title bar, adjacent to the standard 'Minimize' button to the left. This menu contains various important and commonly used commands, including user "option" settings for the entire program.
When starting the program for the first time, the system will prompt you to choose between the "default/light" interface mode and the "dark" interface mode of Revo Registry Cleaner. You can also customize the interface color scheme separately - it can be manually adjusted or directly applied with preset themes (including the "Dark Mode" theme); The relevant setting path is:Menu ->Options ->Views ->Themes.
3、 Registry cleaning tool
After the program starts, the 'Registry Cleanup' module is activated by default. You can start scanning unnecessary, outdated, or damaged registry entries by clicking on available scanning modes or performing a one click "quick cleanup" operation. The 'Quick Clean' function will automatically scan your registry and backup and clean up all detected issues without any further user intervention. If you wish to review the detected issues and take control of the cleaning process, the program provides three scanning modes based on scanning depth and complexity; In addition, there is a 'hosted mode' that allows you to choose the residual areas of the registry that need to be scanned.
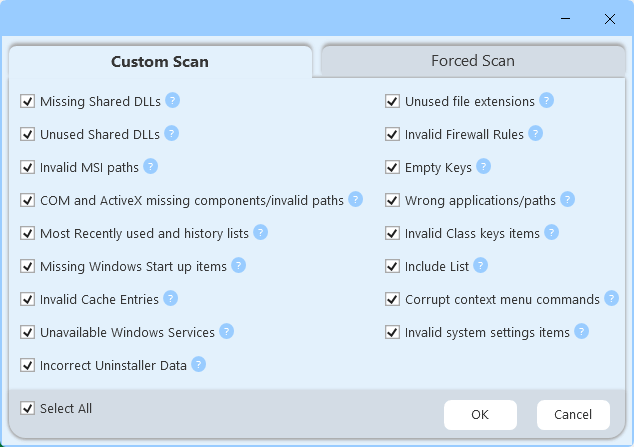
The categories available under "hosting mode" include:
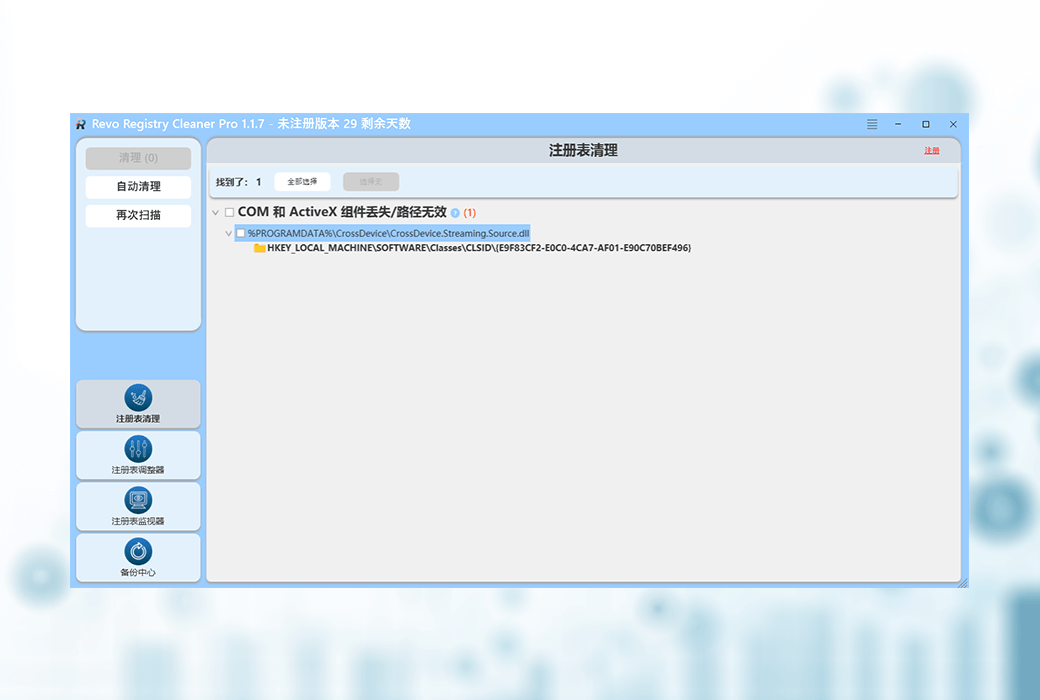
By default, registry scanning is only performed for the current user; But you can choose to scan the registry of all users by clicking the icon below the command button. After the scanning process is completed, the system will display a tree like list containing all discovered registry entries. Among them, the parent node displayed in bold represents the registry category, and the number in parentheses represents the number of registry entries discovered under that category. All discovered items belonging to the same category are listed as sub items of that category. To view the complete path of a discovered key in the registry, you need to expand it. If it has been found that the key belongs to the data section of the registry "value", you will see the registry "key" and "value" displayed in a slash (|) separated form.
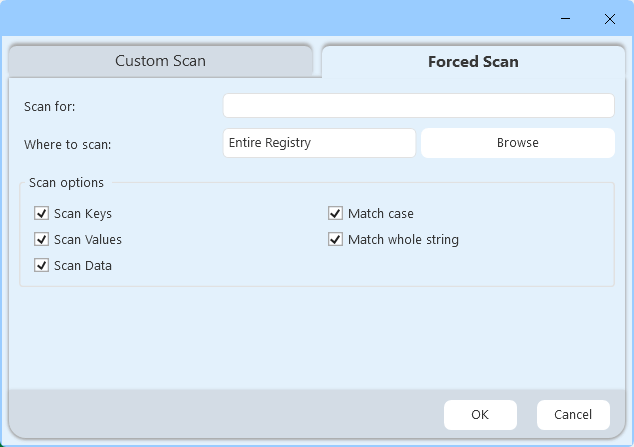
Force Scan:This is an additional mode that allows you to specify a specific location in the Windows registry for searching, as well as specific words, phrase fragments, or names as search keywords.
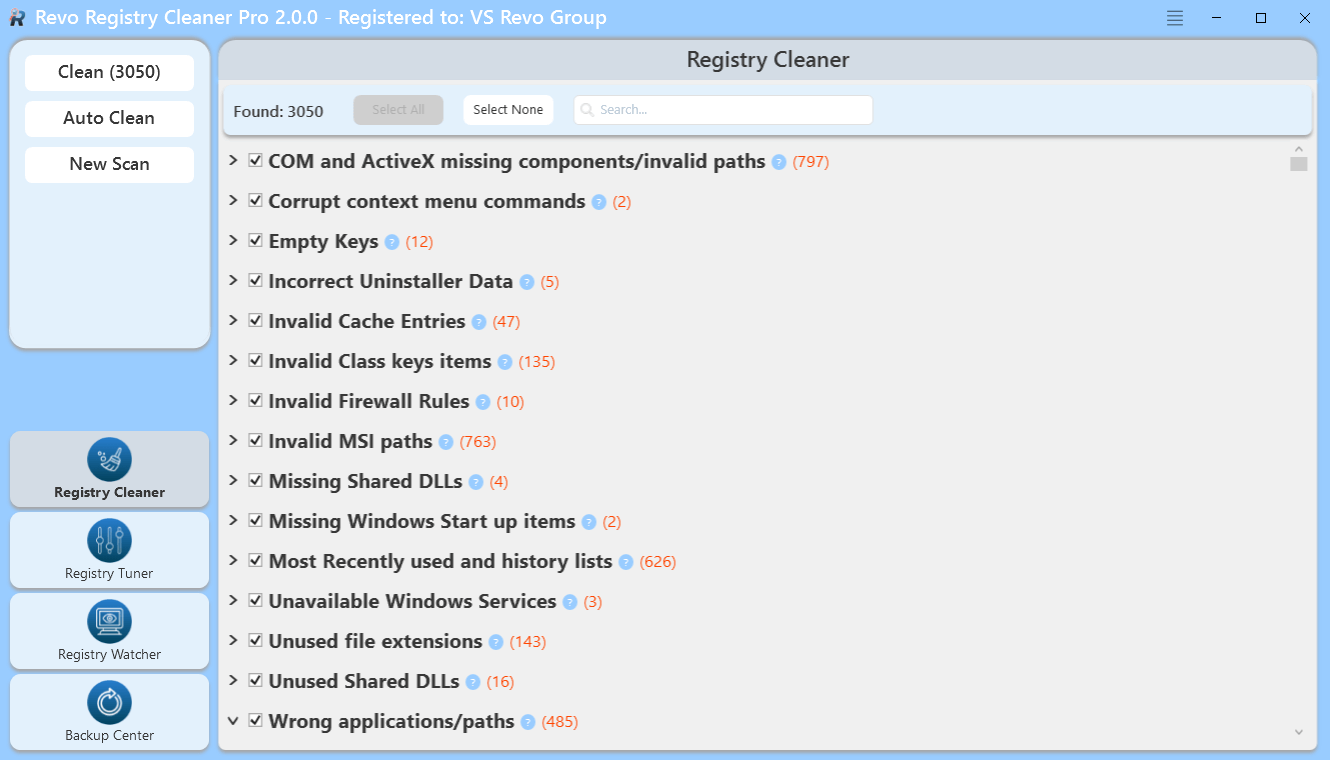
At the top of the screen displaying found items, you will see the total number of found items and a button to select or deselect all items in the list. You can also click on the checkbox in front of any item to individually select or deselect that item.
Right click on any item to open a context menu to assist you in making subsequent decisions. Most of the options are easy to understand, but please note the following:
After selecting the item you want to delete, you must click the "Clean" button in the left command panel. The parentheses next to the 'Clean' button will display the total number of items you have selected in the tree list.
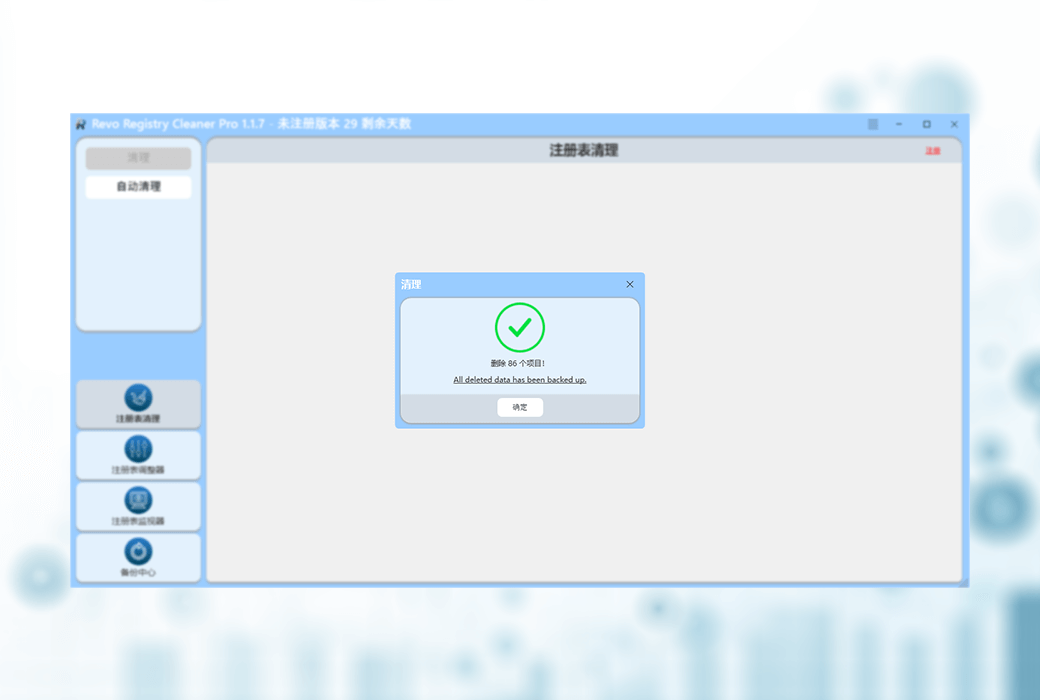
After clicking the "Clean" button, the system will ask if you want to perform a "System Restore" point creation and a "Full Registry" backup before deleting unnecessary registry entries. By default, all deleted registry entries will be automatically backed up. All created backup files are stored in the 'Backup Center'.
Note: If the "Skip warning messages displayed by Revo Registry Cleaner" option is not selected, the system will no longer prompt you to create a "system restore point" and a "full registry backup"; At this point, the backup operation to be performed will be determined based on the corresponding settings under the "Options" ->"Registry Cleaner" ->"General" menu.
If you want to perform a new scan, please click the 'Scan Again' button in the 'Command Panel'. This will display the main interface of the registry cleaning tool, where you can select the scanning mode.
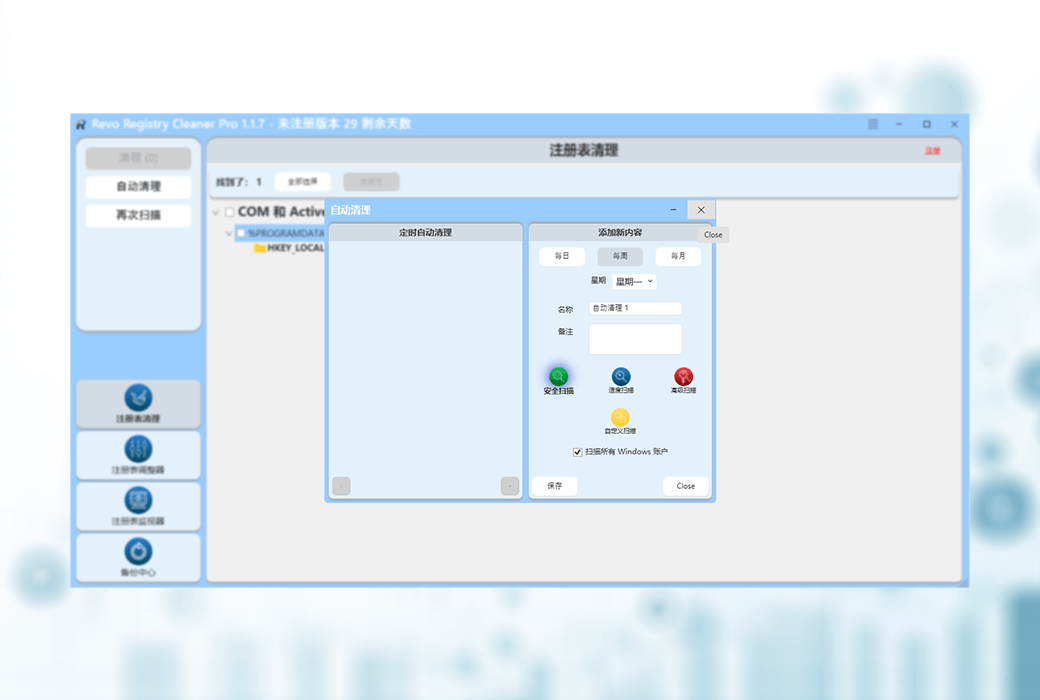
You can also use the "Auto Clean" command in the left "Command Panel" to automate the registry scanning and cleaning process.
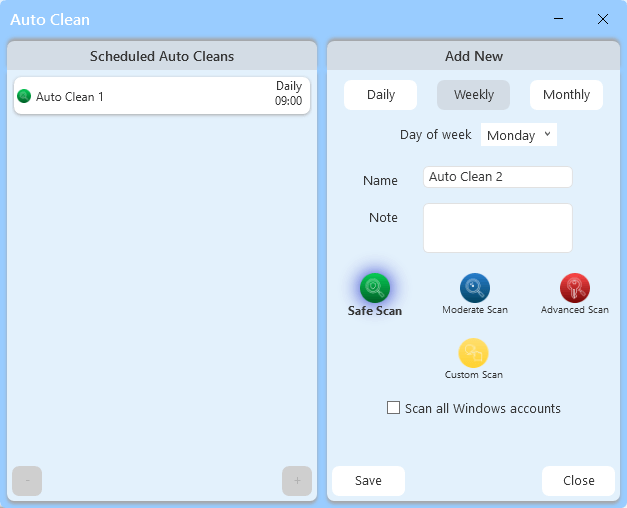
After executing this command, you will see a window divided into left and right parts. The left section displays a list of saved 'Auto Cleanup' plans; The right section allows you to set different parameters according to your own needs to create and save a new "automatic cleaning" plan. Each saved 'Auto Cleanup' schedule has a name, and you can also add notes to it and set the frequency of cleaning operations - you can choose 'Daily' (executed at specific times), 'Weekly' (executed on specific days of the week), or 'Monthly' (executed on specific dates of the month). In addition, you can also choose the scanning mode used during the scanning process and specify whether the cleaning scope is only for the data of the current user account or for the data of all user accounts. After clicking the "Save" button, the "Auto Cleanup" plan will be saved and displayed in the list on the left side of the window. To edit a saved and listed 'Auto Cleanup' plan, simply select the item from the list; Subsequently, you can modify all parameters on the right side of the window and save them again. To delete an 'Auto Cleanup' plan, first select the item from the list, and then click the '-' button in the bottom left corner of the window.
After successfully performing the 'auto clean' operation and clearing invalid data, a brief notification window will pop up in the lower right corner of the desktop for several seconds when your computer is running. This notification will inform you which 'automatic cleaning' task has been successfully completed and display the corresponding cleaning results.
4、 Registry optimizer
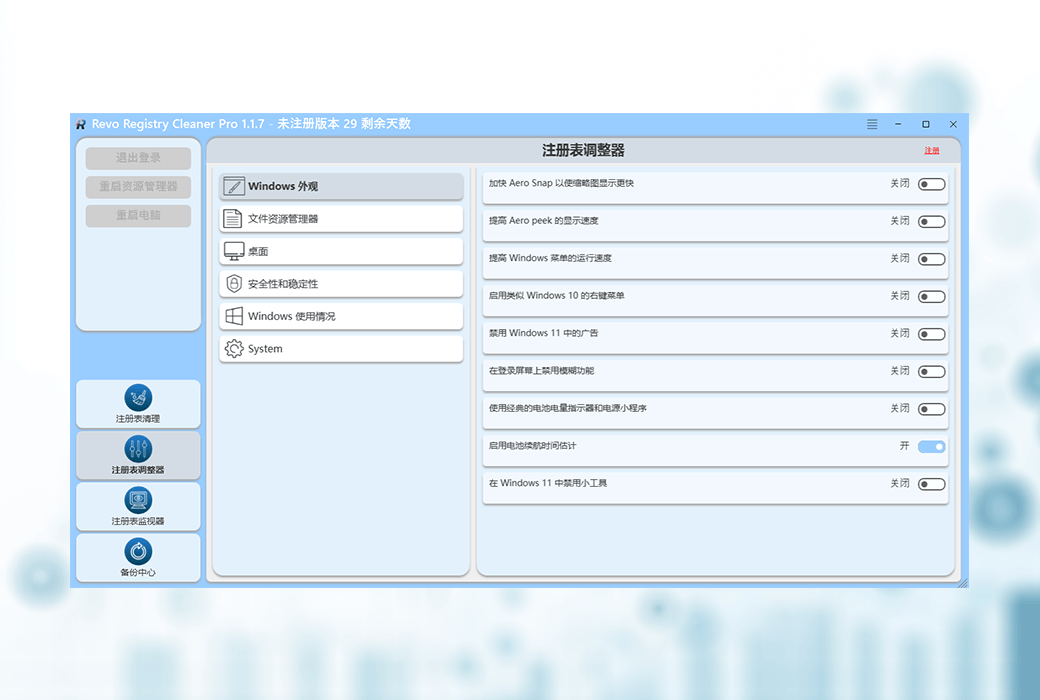
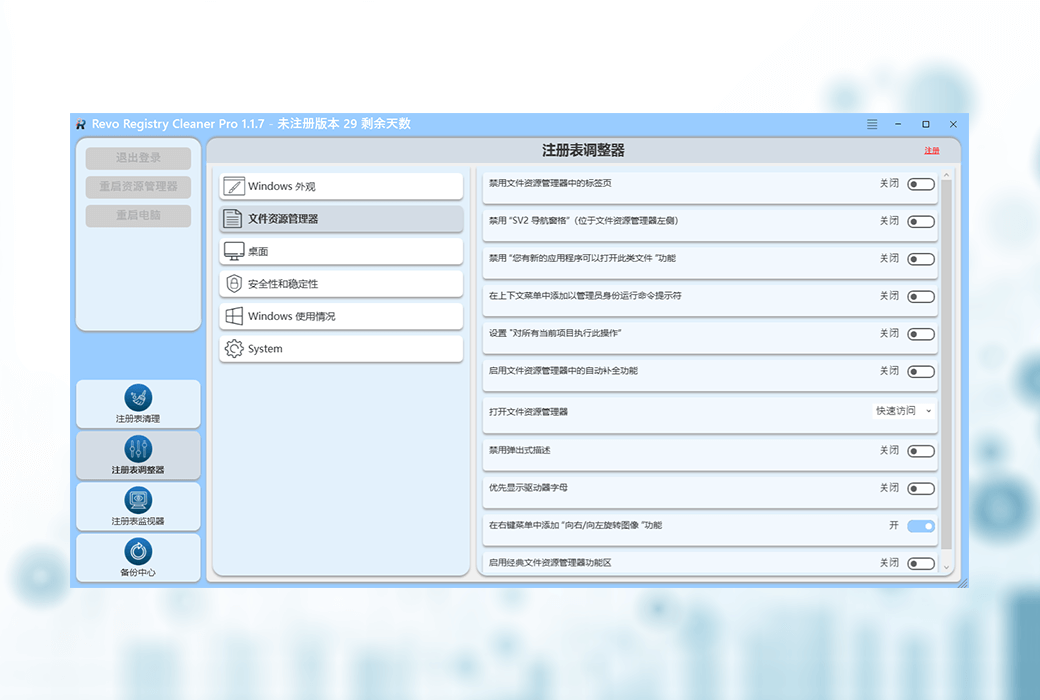
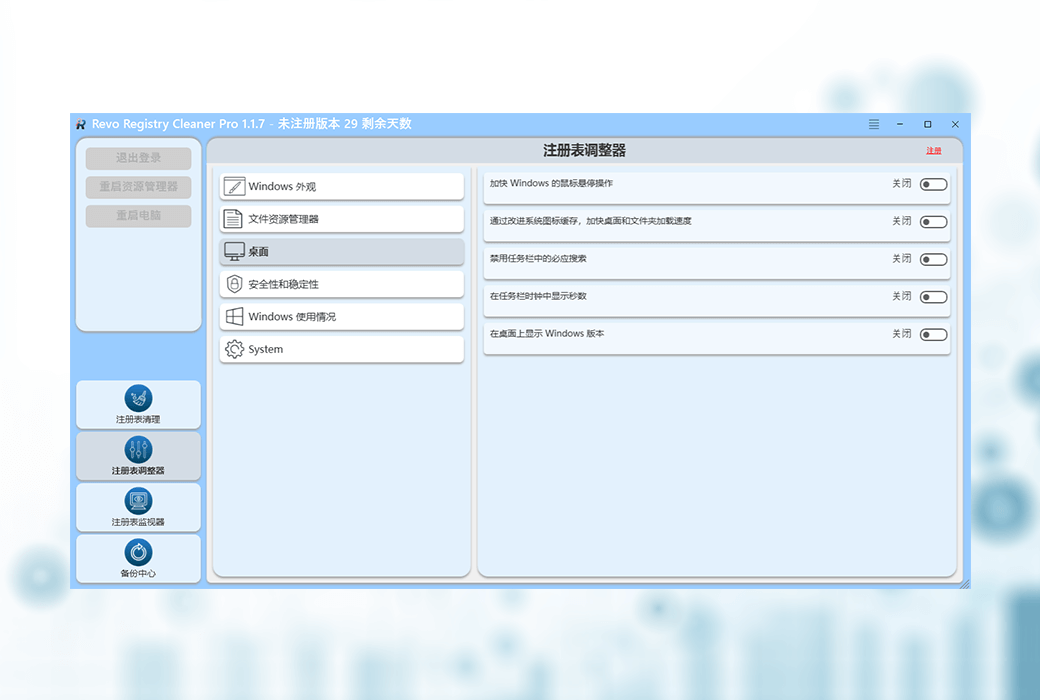
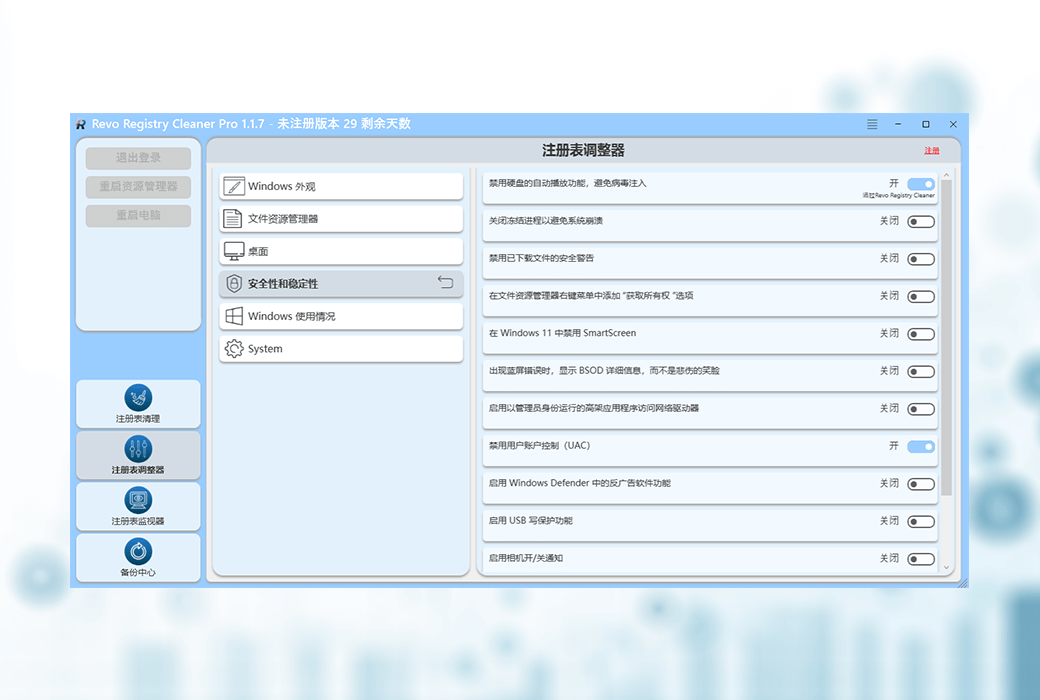
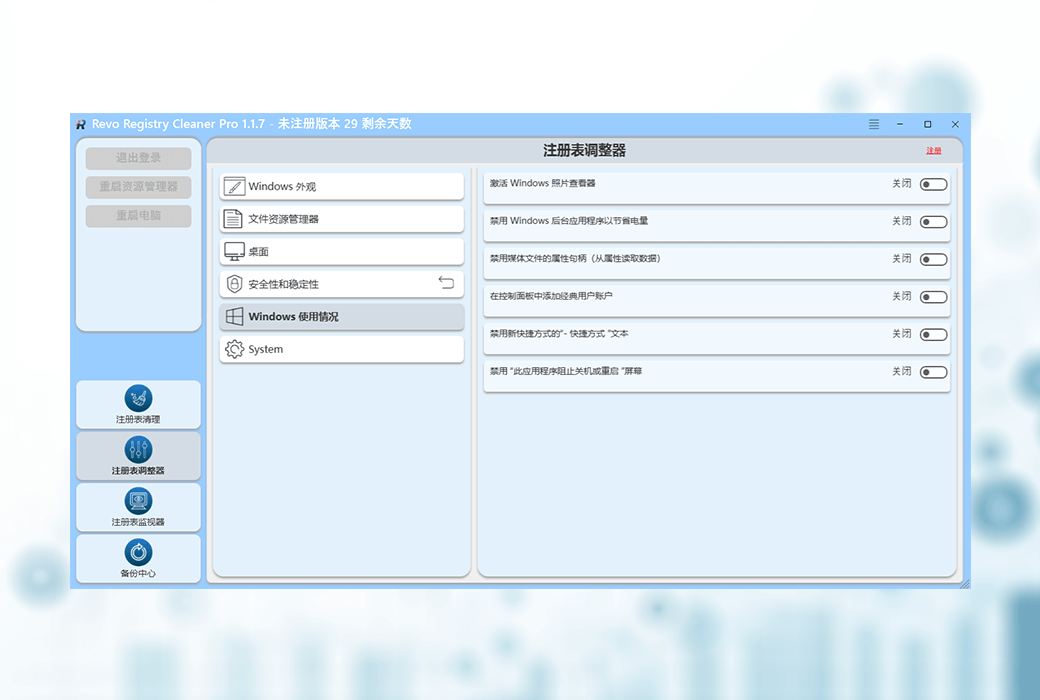
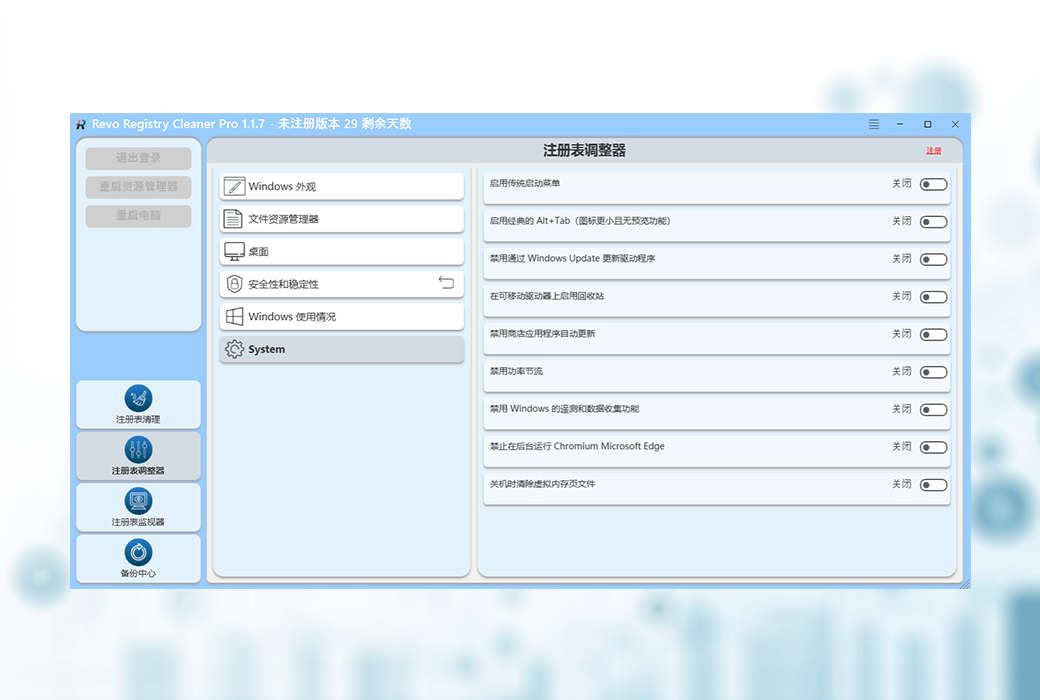
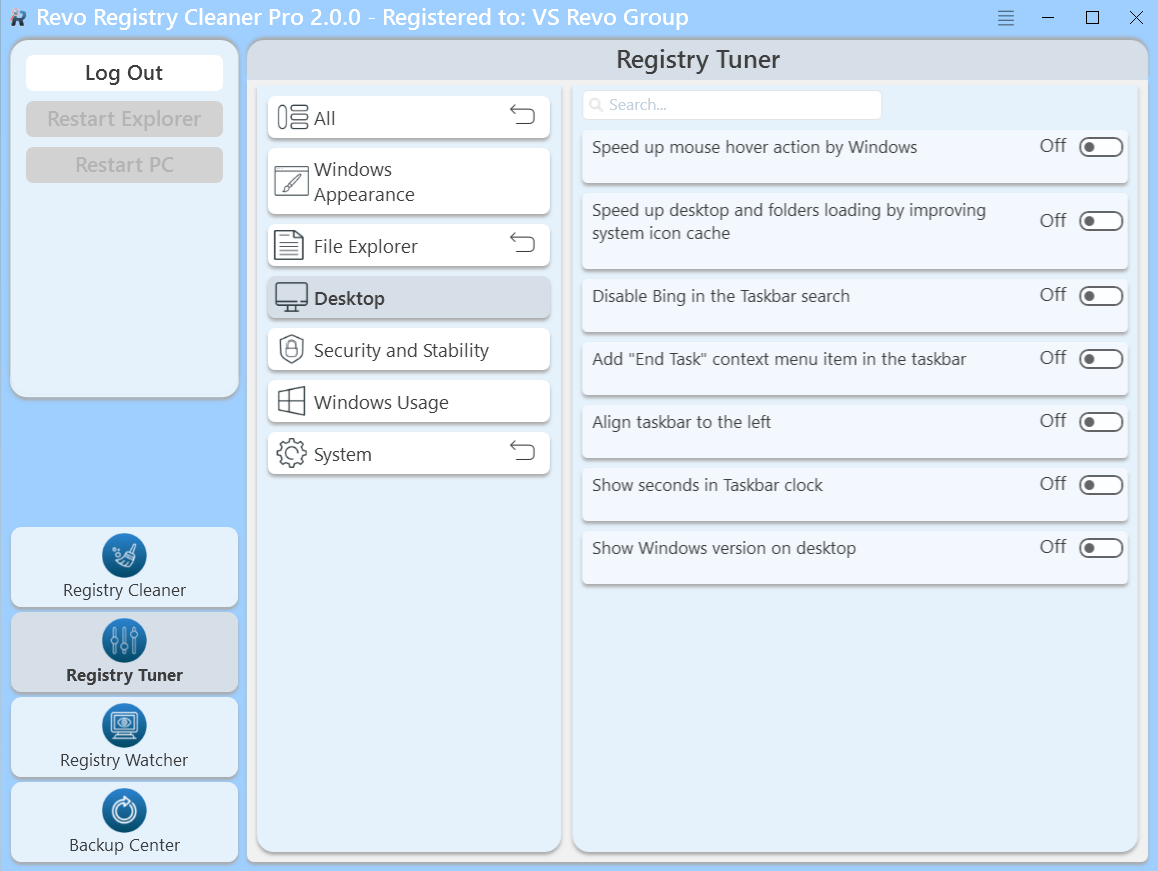
Registry Tuner provides over 50 fine-tuning settings and options to help you easily optimize various configurations of the Windows operating system. After clicking the button located at the bottom of the command panel to start the module, you will see a list containing six major categories, with all fine-tuning options grouped by category; The content of the first category - "Windows Appearance" - will immediately expand in the right area, presenting specific fine-tuning options in the form of a list. Most fine-tuning functions in Registry Tuner can be turned on or off with a single click by sliding the switch; For some options, the system provides drop-down menu buttons for you to choose from multiple preset options. Below each modification control component, there is a small text prompt: "Provided by Revo Registry Cleaner". Depending on the type and scope of the fine-tuning options, some changes may require you to perform actions such as logging out of the user, restarting Windows Explorer, or restarting the computer before they can take effect. If you need to perform such operations, the system will display a red prompt text below the list of items you have modified. The corresponding operation buttons are located on the left command panel; When a change requires subsequent actions, the corresponding button will be activated, and you must click on the button for the change to take effect. In addition, you can also use the search box function to enter keywords or keyword fragments to quickly filter and locate the desired options.
1. Windows appearance
Includes the following optimization adjustments:
2. File Explorer
Includes the following adjustment options:
3. Desktop
Includes the following optimization adjustments:
4. Safety and stability
Includes the following optimization settings:
5. Windows usage
Includes the following optimization adjustments:
6. System
Includes the following optimization adjustments:
5、 Registry Monitor
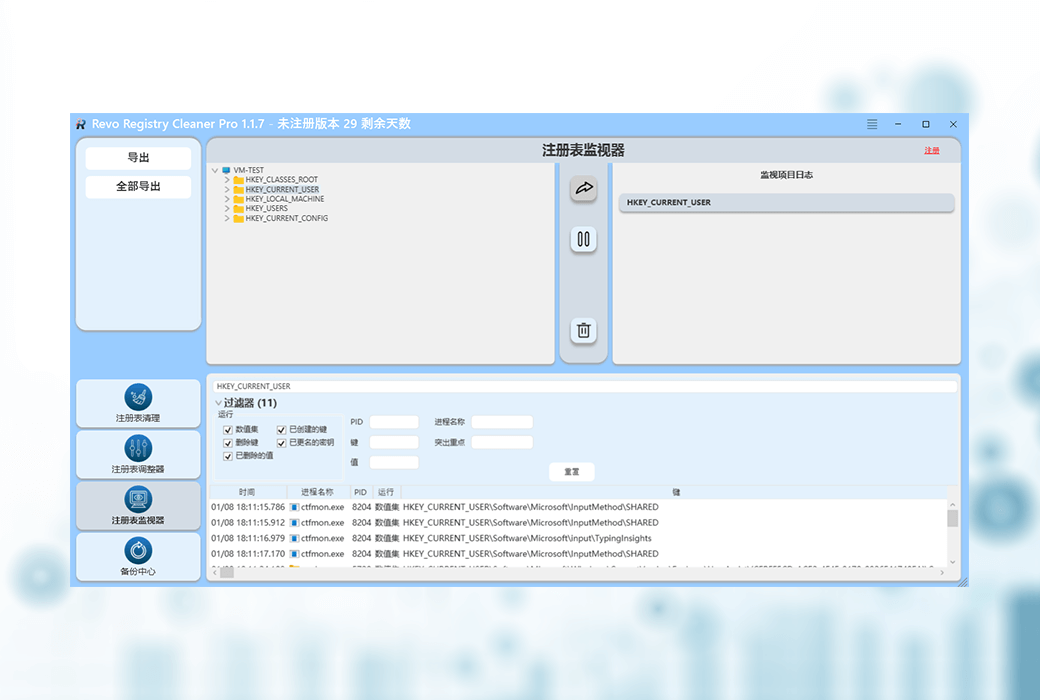
With the Registry Monitor module, you can easily track what changes have occurred in the registry and which process executed these changes. Click the "Registry Monitor" button below the "Command Panel" to activate the module. The interface of this module is mainly divided into four parts. The registry tree is displayed in the upper left corner, which allows you to navigate and find the registry key that interests you. To start monitoring a registry key, you need to first select the key and then click the arrow button located in the right panel of the registry tree. This operation will move the selected registry key to the upper right pane, which displays the registry key you have added and are currently monitoring. In addition, there are "Pause/Start Monitoring" and "Delete" buttons located in the top center panel, which are used to perform corresponding operations on the registry entries in the "Monitored Item List".
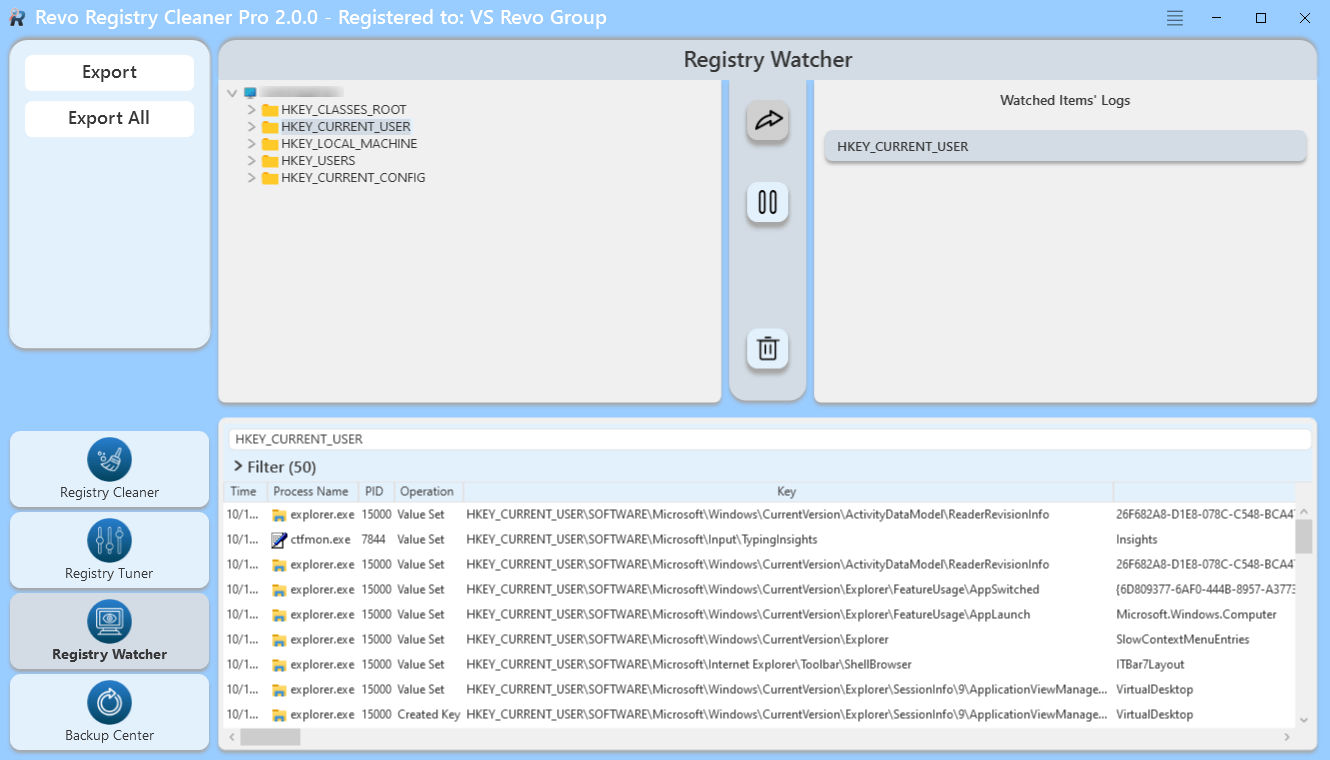
Once the registry key for tracking is added, its monitoring work will start immediately. If you need to pause monitoring, you can select the registry key from the top right panel and click the "Pause" button; At this point, the button will switch to the 'Start' button, allowing you to resume monitoring at any time when needed. If you no longer want to monitor a registry key, you can use the 'Delete' button to remove it from the list.
The module area below the screen is equipped with a 'Result Panel' and corresponding filtering options. The content of this panel is updated in real-time, displaying the captured data of the currently selected tracking key, covering many attributes such as modification time, process name, PID (Process ID), registry operation type, registry key path, registry value name, new value data, old value data, and value data type.
The upper part of the panel is the "Filter" area, which allows you to filter data based on almost all tracking parameters. In addition, through the "Highlight" input box, you can highlight specific text content. For the monitoring data of the selected registry key, you can export it by using the "Export List to File" command in the right-click context menu; The currently supported formats include TXT, CSV, and XLSX.
Similarly, through the right-click context menu, you can use the "Clean" command to clear all captured data currently displayed; In addition, you can also use the "Open in the Registry Editor..." command to directly open any specified registry key in the Windows Registry Editor.
To export all captured data for all monitored registry entries, you can use the "Export All" button in the command panel. The currently supported formats include TXT, CSV, and XLSX.
6、 Backup Center
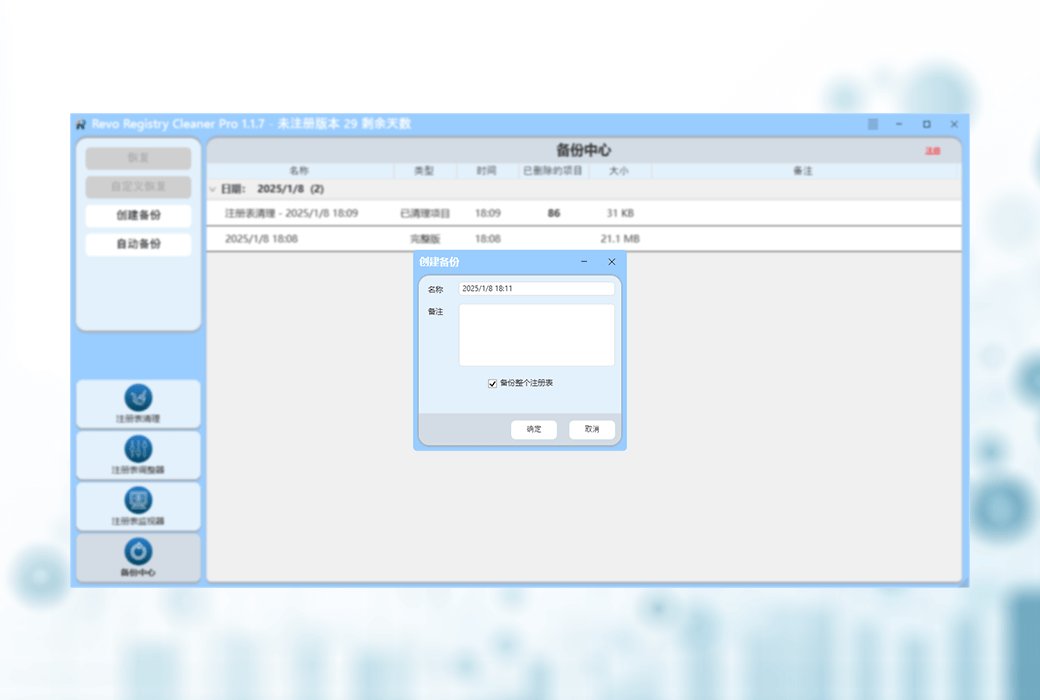
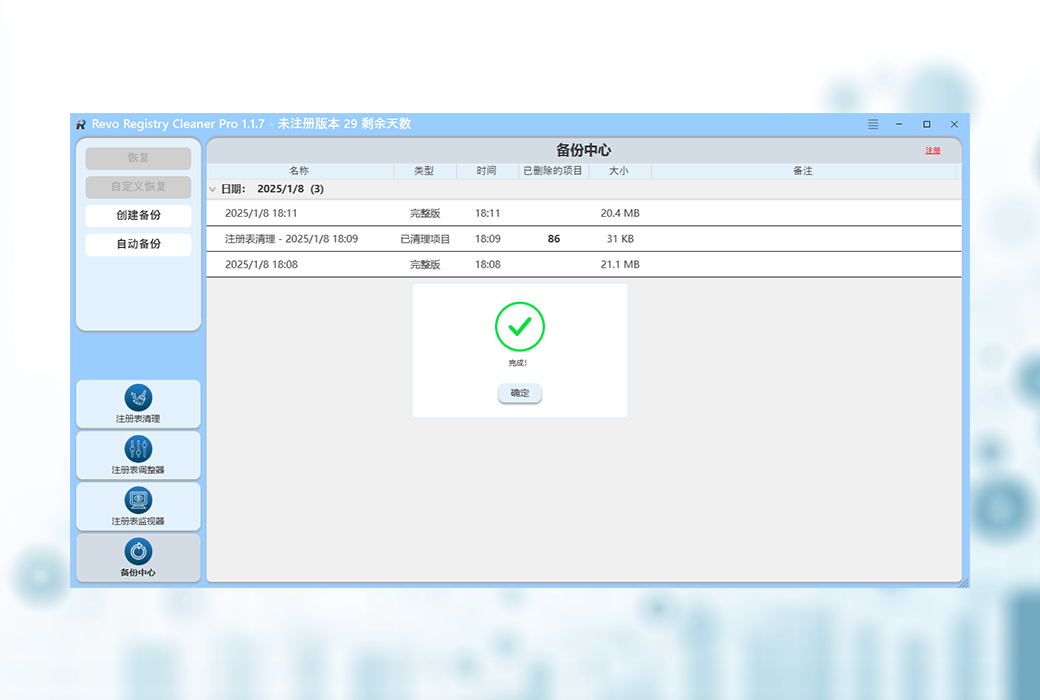
The 'Backup Center' module allows you to create and manage various types of registry backups - whether they are automatically generated by Revo Registry Cleaner during runtime or manually created for specific purposes. You only need to click the module button at the bottom of the "Command Panel" to start the module. The main interface will sort by date, listing all created backups and their detailed properties.
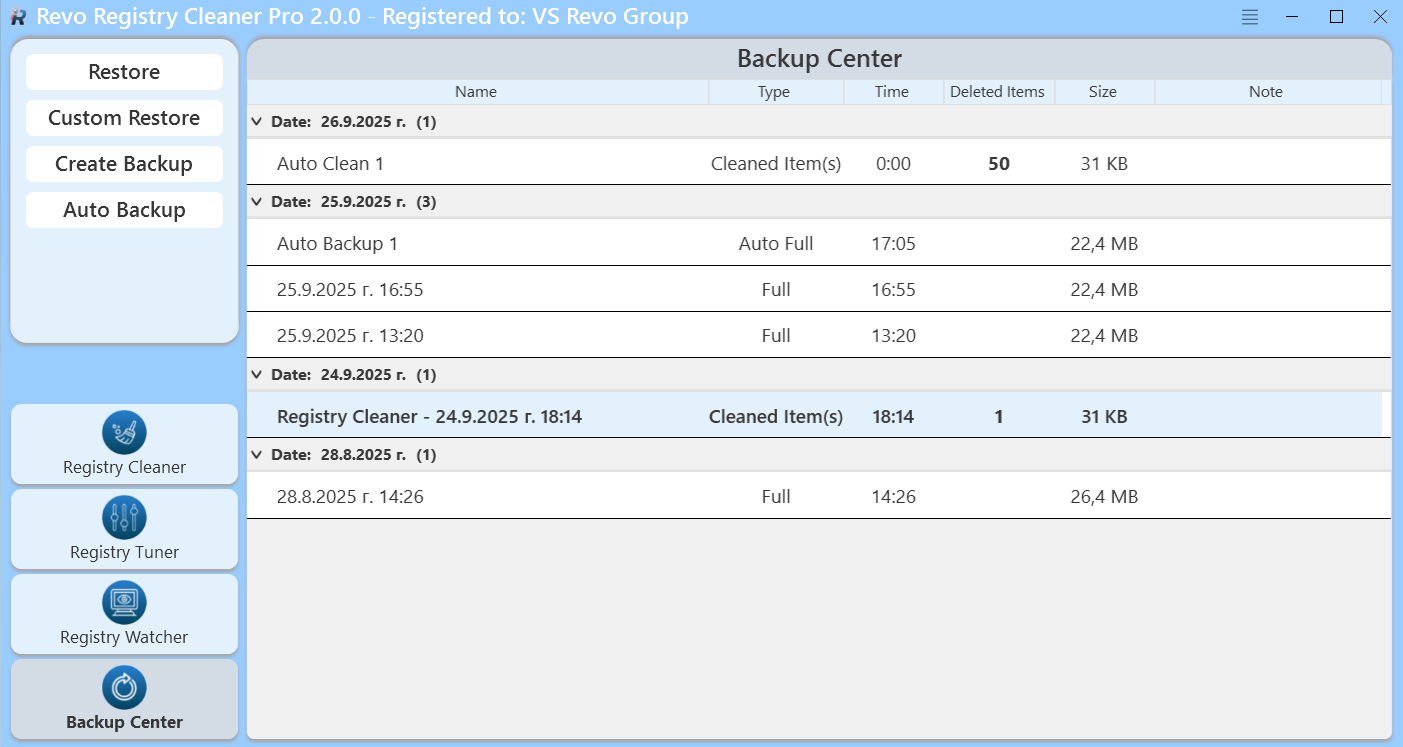
In the Command Panel, you can click the "Create Backup" button to create a partial or complete registry backup. At this point, a window will pop up for you to specify a backup name, fill in comments (optional), and decide whether to backup the entire Windows registry or only specific registry entries by checking the "Backup entire registry" option. If you choose to back up a specific registry key, the system will display a registry tree structure; Among them, the registry entries that are available for backup will be displayed in black font, while the entries that are prohibited from backup will be displayed in gray font.
You can also use the "Auto Backup" command in the left "Command Panel" to automate the registry backup process. After executing this command, the system will pop up a window divided into left and right parts. The left area lists all saved scheduled automatic backup tasks; The right area allows you to set different parameters according to your own needs to create and save new scheduled automatic backup tasks. Each saved scheduled automatic backup task has a unique 'name'; In addition, you can add a "note" to it and set its execution cycle - that is, choose whether to execute it "daily" at a specific time, "weekly" on a specific date, or "monthly" on a specific date. By selecting the 'Backup entire registry' option, you can flexibly choose whether to backup the entire Windows registry or only specific registry entries. If you choose to back up a specific registry key, the system will also display a registry tree structure, where the backed up key is displayed in black font and the backed up key is displayed in gray font. After clicking the "Save" button, the automatic backup task will be successfully saved and displayed in the left list of the "Automatic Backup" window. If you need to edit a saved automatic backup task in the list, simply select the task in the left list and modify its parameters in the right area of the window and save it again. To delete an automatic backup task, simply select the task in the list and click the "-" button in the bottom left corner of the window.
When your computer is running normally, once an automatic backup task is successfully completed, a small notification box will briefly (lasting for a few seconds) pop up in the bottom right corner of the desktop, informing you which automatic backup task has been successfully executed.
When browsing through the completed backup list, you can choose to restore all data in the selected backup by clicking the "Restore" button in the "Command Panel"; You can also restore only a portion of the data in the backup by clicking the "Custom Recovery" button in the "Command Panel". To restore all data, select the backup from the list and click the 'Restore' button at the top of the command panel. If you only need to restore some of the data contained in this backup, please select the backup and click "Custom Recovery". Subsequently, a list of registry entries will pop up for you to select the specific items that need to be restored. Click the 'Restore' button to complete the operation.
In addition, you can also execute the "Restore" and "Custom Restore" commands through the right-click menu; Meanwhile, you can also use the "Delete" command in the right-click menu to remove individual backups, or use the "Delete All" command to clear all backups.
7、 Menu/Options
To view all options for Revo Registry Cleaner, click on the "Menu Three" button in the upper right corner and select "Options".
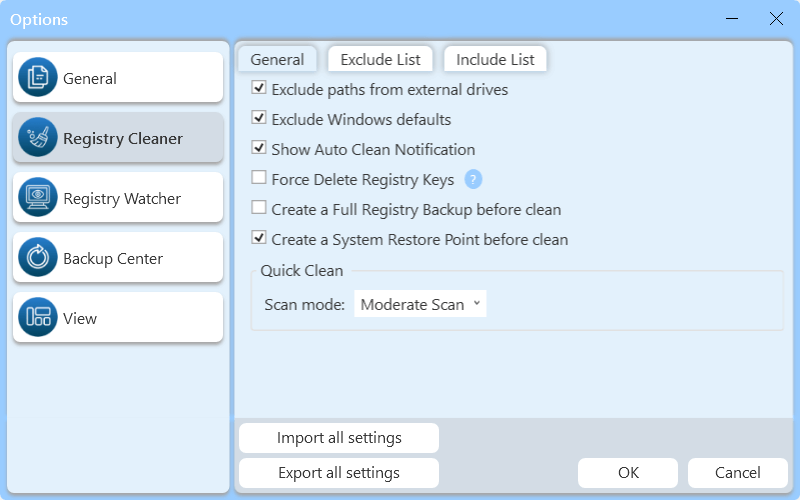
The remaining menu items are clear at a glance.
1. General provisions
Provide general options for Revo Registry Cleaner:
Note: You must allow Revo Registry Cleaner to connect to the Internet in the firewall settings.2.1 Registry Cleaner (General Settings)
2.2 Registry Cleaner (Exclusion List)
Registry entries listed in the 'exclusion list' will not be scanned when using the registry cleaner for scanning operations. You can use the "Add" and "Remove" buttons to add or remove items from this list.
To exclude a registry key, the complete path of the registry key must be added. For example:
For each registry key in the list, an option called 'Include subkeys' is provided. If this option is enabled, the selected registry key and all its subkeys will be excluded.
There is a checkbox in front of each registry key to enable or disable exclusion settings for that registry key. If there is a check mark in the checkbox, it indicates that the registry key has been excluded.
2.3 Registry Cleaner (including list)
If you want to use a registry cleaner to clear the contents of specific registry entries, you can add these registry entries to the 'Include List'.
Note: The system will only process items in the 'Include List' when a 'Managed Scan' is performed and the 'Include List' category is selected.
To include a registry key in the 'include list', the complete path of the registry key must be added. For example:
For each registry key, there is an option called 'Include Sub keys'. If this option is enabled, all sub keys under the selected registry key will also be cleared.
There is a checkbox in front of each registry key to enable or disable inclusion settings for the corresponding registry key. If a check mark is displayed in the checkbox, it means that the registry key has been included.
Important reminder: When adding a registry key to the 'Include list', please make sure you are clear about what you are doing; Because once the 'Managed Scan' is performed and the 'Include List' category is selected, the data inside the registry key and (depending on the option settings) its sub keys will be deleted.
3. Registry Monitor
4. Backup Center
5. View
8、 Command line support
Some operations of Revo Registry Cleaner can be executed through the command line. The supported command-line operations and their parameters are as follows:
Registry Clean - You can clean up registry entries that are identified as unnecessary or outdated by specifying the desired scanning mode. All discovered items will be automatically backed up and deleted.
grammar
Revo Registry Cleaner -clean -scanning mode -affected accounts
The parameters are described as follows:
Example: "Revo Registry Cleaner. exe" - clean safe → Perform a security scan on the current userRevo Registry Cleaner. exe - clean modify all ->Perform moderate scan on all usersRegistry monitoring - You can start or stop monitoring changes in specified registry keys.
grammar
Revo Registry Cleaner watch action "Registry Path"
The parameters are described as follows:
Example: "Revo Registry Cleaner. exe" - catch HKEYTECURRENT-USER → start monitoring HKEYTECURRENT-USERRevo Registry Cleaner. exe "- watch stop HKEYTERENT-USER → Stop monitoring HKEYTERENT-USER9、 How to restore a complete registry backup
According to your settings, Revo Registry Cleaner can create a complete registry backup before each cleaning operation; You can also perform this operation through the 'Backup Center'.
Important note: A full registry backup should only be used when Windows Restore/Backup Manager is unable to restore removed items or when Windows cannot start properly.
Note: The steps for restoring a complete registry backup will vary depending on the version of your computer's operating system, as follows:
1.Windows 7
Note: Some OEM computers may use function keys other than F8, so please refer to the accompanying computer instructions.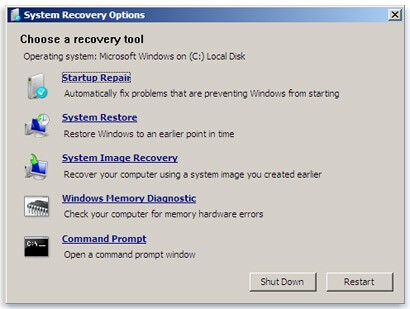
Enter the following command (in bold) and press Enter after each step:(Assuming you have installed Windows on a "local disk (C:)")Step 1: C:Step 2: CD UsersStep 3: DIR (A list of folder names will appear, including your username, please remember it for the next step.)Step 4: CD “XXX\AppData\Local\VS Revo Group\Revo Registry Cleaner\Backups\Last\” ( Replace XXX with the username you found in step 3. Please make sure to include the above quotation marksFor Revo Registry Cleaner Portable, you should navigate to the folder of your choice (e.g.):C:\Users\User\Desktop\Revo Registry Cleaner Portable\Data\UserXXX\Backups\Last\Step 5: ren Restore.dat Restore.batStep 6: Restore. bat2.Windows 8
You need to start the computer in a special way to find the 'Command Prompt' option.
First, hold down the Shift key, and then restart the computer as usual. Please hold down the key continuously until the computer restarts completely and displays the 'Select an option' screen.
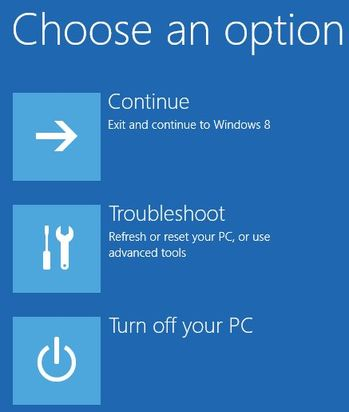
Please follow the steps below:
① Click the 'Troubleshooting' button.
② Click on the 'Advanced Options' button.
③ Click the 'Command Prompt' button.
④ After logging into your account, you will see a command prompt window. Enter the following command (in bold) and press Enter after each command:
(Assuming you have installed Windows on a "local disk (C:)")
(A list containing folder names will appear, including your username, please remember it for future use)
(Replace XXX with the username you found in step 3.). Please make sure to include the quotation marks above
For Revo Registry Cleaner Portable, you should navigate to the folder of your choice (for example):
C:\Users\User\Desktop\Revo Registry Cleaner Portable\Data\UserXXX\Backups\Last\”
3. Windows 10 and Windows 11
You need to start the computer in a special way to find the 'Command Prompt' option.
First, hold down the Shift key, and then restart the computer as usual. Please hold down the key continuously until the computer restarts completely and displays the 'Select an option' screen.
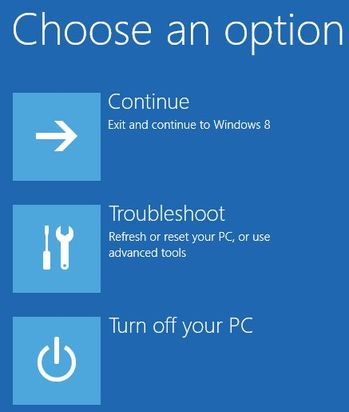
Now, please follow the steps below:
① Click the 'Troubleshooting' button.
② Click on the 'Advanced Options' button.
③ Click the 'Command Prompt' button.
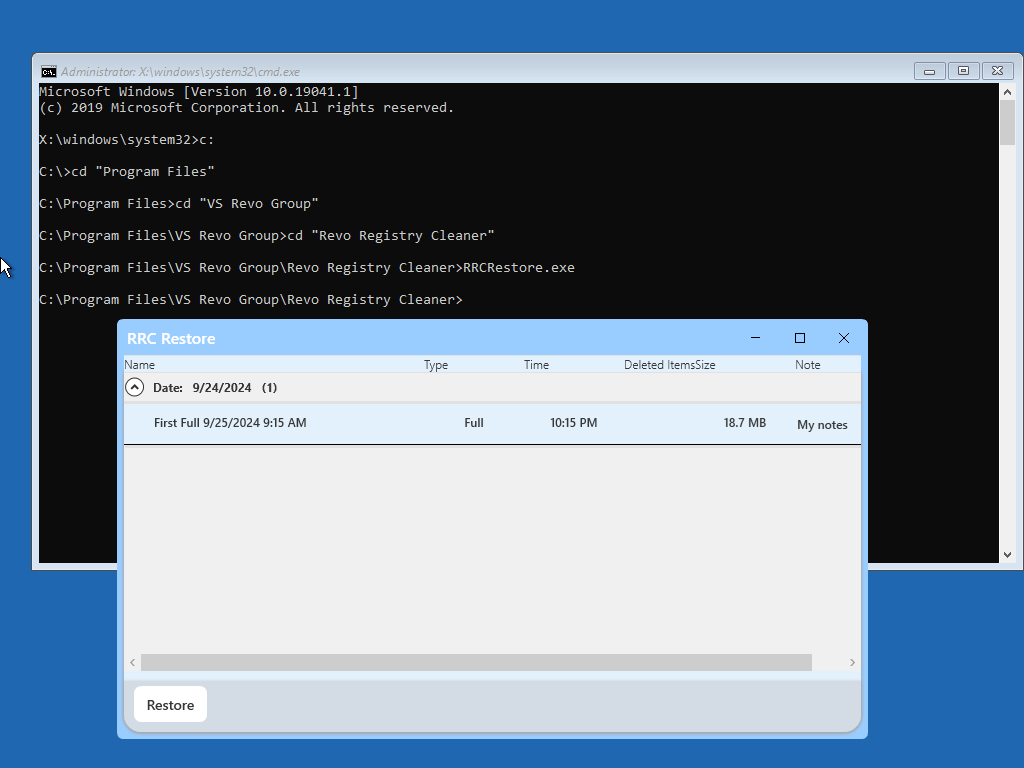
④ Log in to your account, and then you will see a 'Command Prompt' window. Please enter (type) the following commands one by one (displayed in bold). After each input, please press the Enter key:
(Assuming you have installed Windows on a "local disk (C:)")
If you are using Revo Registry Cleaner Portable, you should navigate to the folder of your choice (for example):
C: \ Users \ User \ Desktop \ Revo Registry Cleaner Portable \ x64 "or C: \ Users \ User \ Desktop \ Revo Registry Cleaner Portable \ x86" (applicable to 32-bit systems)
10、 Registration/activation and subscription updates
Revo Registry Cleaner Pro offers a 30 day free full-featured trial period, during which you can use the software without any restrictions. The trial period will automatically start when the program is first installed on a specific system.
You can check the title bar at the top of the main window of Revo Registry Cleaner Pro to see how many days are left until the end of the trial period; In addition, whenever you close Revo Registry Cleaner Pro, the system will pop up a reminder window informing you of the remaining trial days. If you wish to continue using Revo Registry Cleaner Pro after the trial period ends, you can do so throughSoft Shopping MallPurchase license.
After purchasing the license, you will receive a serial number containing a specific update subscription period. You must enter the serial number and fill in the corresponding registration name (username) in the registration interface of Revo Registry Cleaner Pro to complete the registration. There are currently two ways to activate or update your Revo Registry Cleaner Pro subscription: one is online activation; Another way is to activate through a specific file automatically generated by Revo Registry Cleaner Pro.
Once activated successfully, your Revo Registry Cleaner Pro version will no longer be time limited; However, you can only update to the latest version of the software release for free during the current subscription period. After the subscription period expires, you will no longer be able to install new versions of Revo Registry Cleaner Pro that are released after the subscription expiration date. To view the subscription period of the current license, please click on the "Menu" button in the upper right corner of the main window and select "About".
If you decide to renew (extend) the update subscription period for Revo Registry Cleaner Pro and your current subscription has not yet expired, the subscription period included in the new serial number you enter will automatically accumulate over your remaining subscription days.
If you encounter any questions or issues during the activation of Revo Registry Cleaner Pro, please feel free to contact our online customer service or through support@revoregcleaner.com or registration@revoregcleaner.com Contact the official. If you are contacting the official, please be sure to attach your information